Deploying Transporters in Amazon EC2
You need to deploy a Transporter in Amazon EC2 to enable the following features:
-
Backing up VMware VMs and/or Amazon EC2 Instances to a backup repository located in Amazon EC2.
-
Backing up Amazon EC2 Instances in a particular Amazon EC2 Region.
NAKIVO Backup & Replication automates deploying a Transporter in Amazon EC2. To deploy a Transporter in Amazon EC2 within the product interface, follow the steps below:
-
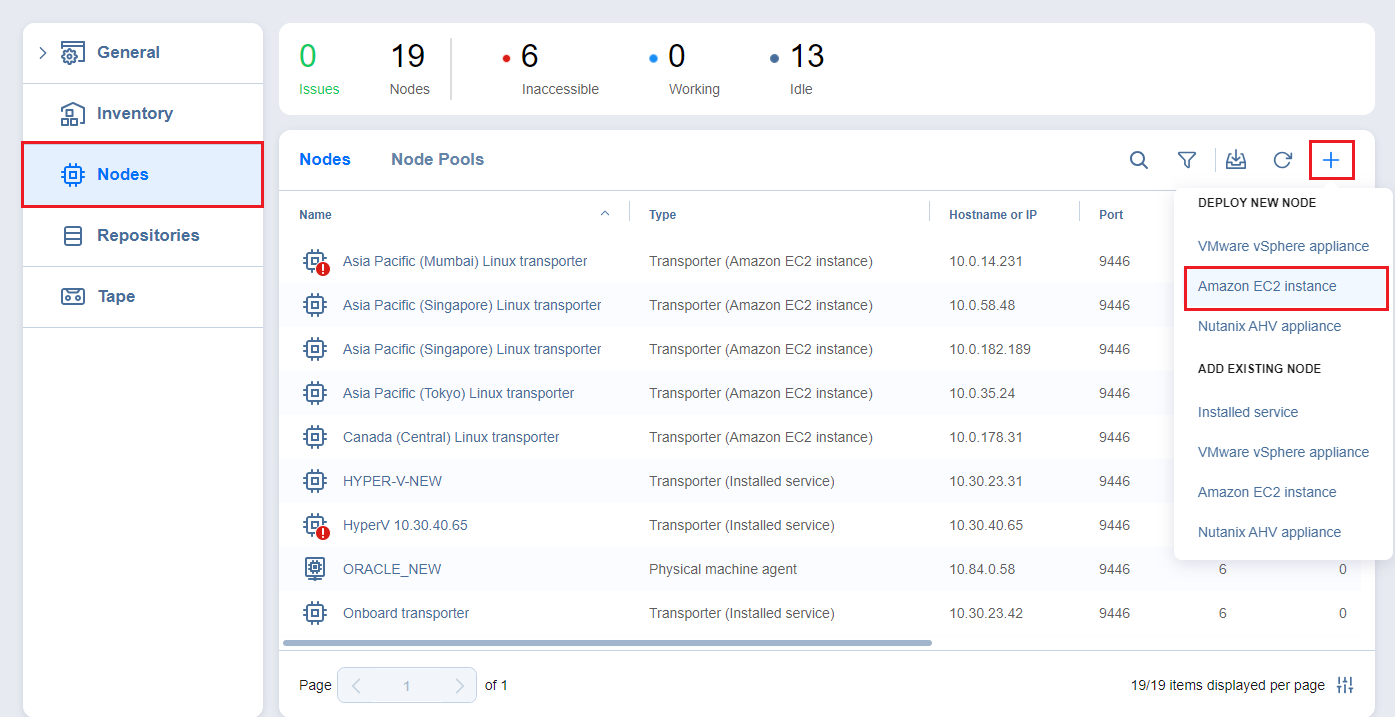
Click Settings in the left pane of the product, go to the Nodes tab, and click + .
-
In the Deploy New Node section, click Amazon EC2 instance.
-
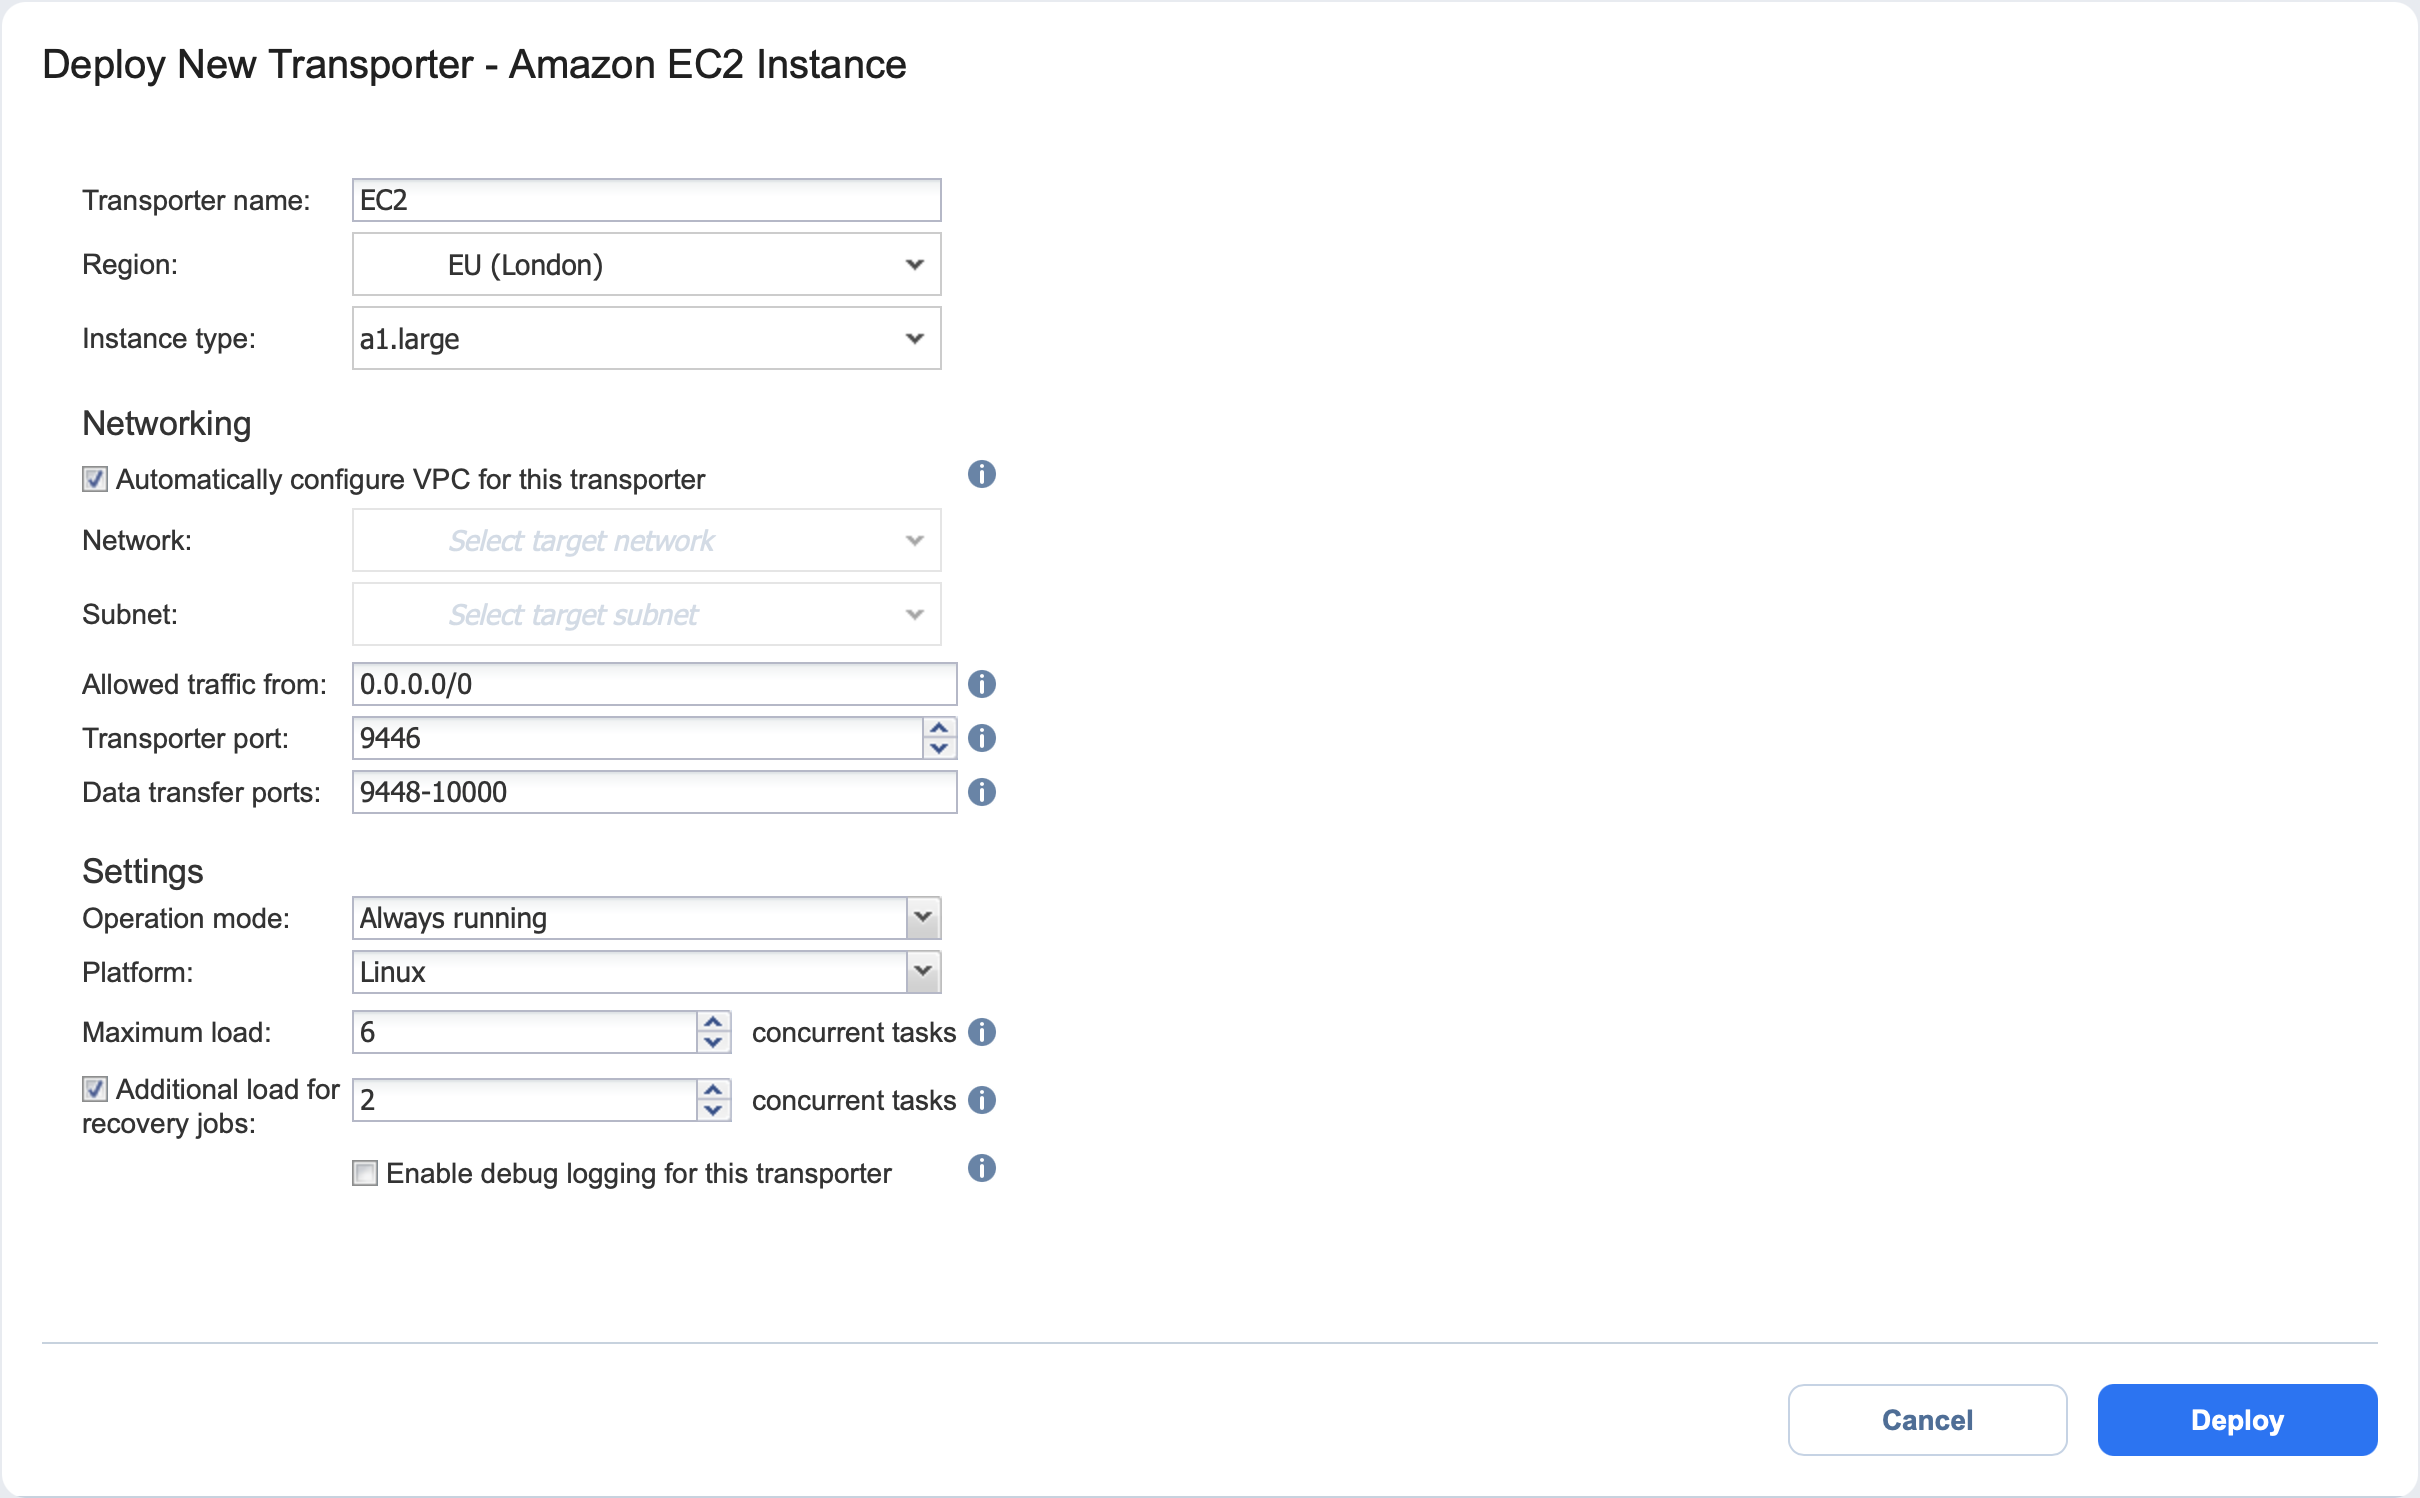
The Deploy New Transporter - Amazon EC2 Instance dialog opens. Fill out the fields as described below:
-
Transporter name: Enter a name for the Transporter.
-
Region: Select an Amazon EC2 region where you wish to deploy the Transporter. This will enable you to create a backup repository in the region as well as back up Amazon EC2 Instances available in the region.
-
Instance type: Choose a type of Amazon EC2 Instance (for example, "t2.medium") that will be used to deploy the Transporter. Note that more powerful instances may be able to process data faster, but will cost more to run on Amazon EC2.
Note
ARM-based instances cannot be selected if you have chosen Windows for the Platform option.-
Click More options to reveal and edit the following options:
-
In the Networking section:
-
Automatically configure VPC for this transporter: If selected, a new VPC with a single public subnet will be created and used to deploy this transporter. If you want to deploy the Transporter into a different VPC and subnet, deselect this option.
-
Network: Select a network to which the Amazon EC2 instance with the Transporter will be connected.
-
Subnet: Select a subnet for the Amazon EC2 Instance with the Transporter.
-
-
Allowed traffic from: Enter the IP addresses of the machines that can connect to the Amazon EC2 instance with the Transporter. Access from other IP addresses will be restricted.
Important
By default, the Amazon EC2 security group is not restricted; that is, the Transporter can be accessed by and receive tasks from any machine. For security purposes, restrict traffic to trusted IP addresses. -
Transporter Port: Specify the port number that will be used to connect to the Transporter.
-
Data transfer ports: Specify a range of port numbers (from 1 to 65535) that will be used to transfer data. The range you specify should contain at least 100 ports. Make sure that the ports you specify are open in your firewall.
-
-
In the Settings section:
-
Operation mode: If you select the Running while required option, the Amazon EC2 Instance with the Transporter will be powered on only when the Transporter is required to run a backup, replication, and recovery tasks.
-
Platform: Choose an OS for the instance where the Transporter will be deployed.
Note
Windows OS is not supported for ARM-based instances. -
Maximum load: Specify the maximum number of tasks that the Transporter should process simultaneously. An example of a task is processing a single VM disk or a single file recovery session.
-
Additional load for recovery jobs: If selected, the specified amount of tasks will be added to set the maximum Transporter load to be used for recovery jobs exclusively. This allows for running the specified quantity of concurrent recovery jobs along with other types of jobs without the need to wait for their completion.
-
Enable debug logging for this Transporter: Enables debug level logging for the current Transporter. Since this feature slows down Transporter performance, it is recommended that you enable debug logging only for the investigation of support issues.
-
Note
Refer to Amazon EC2 Concepts for the definitions of Amazon EC2-related terms. -
-
-
-
Click Deploy.
Note
-
After deploying a Transporter in Amazon EC2, you need to download the Transporter Key. A Transporter Key is used by NAKIVO Backup & Replication to access and manage the Transporter in Amazon EC2. If you lose the current instance of NAKIVO Backup & Replication and install a new copy of the product, you will need to provide the Transporter Key to access the Transporter.
-
You may be additionally charged for using a 3rd-party resource. Please refer to the 3rd-party resource provider documentation for details.
-

