Using Email with Gmail OAuth Authentication
To configure Gmail OAuth 2.0 authentication for NAKIVO Backup & Replication, follow the steps below.
In Google Cloud Console
-
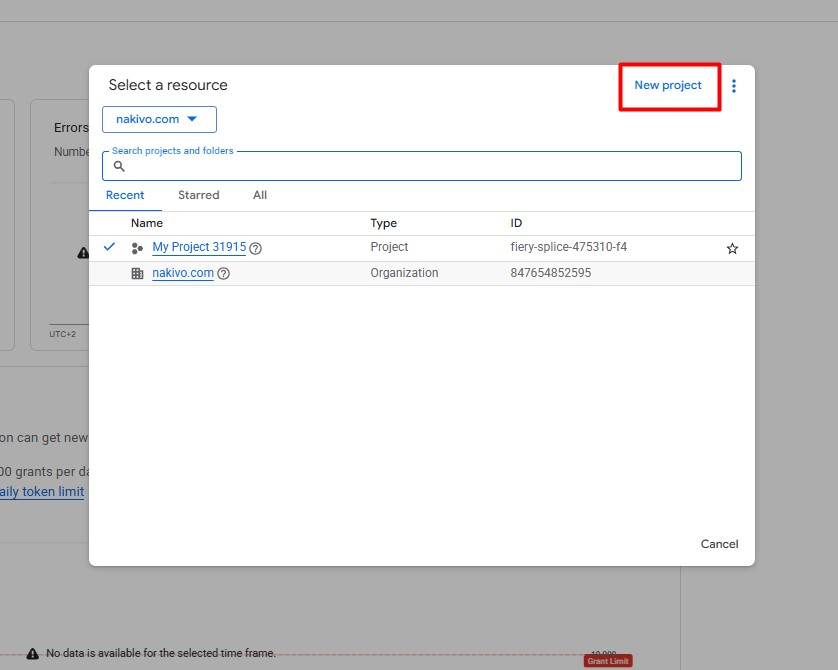
Open Google Cloud Console and create a new project for OAuth configuration. For more information, refer to Google Documentation.

-
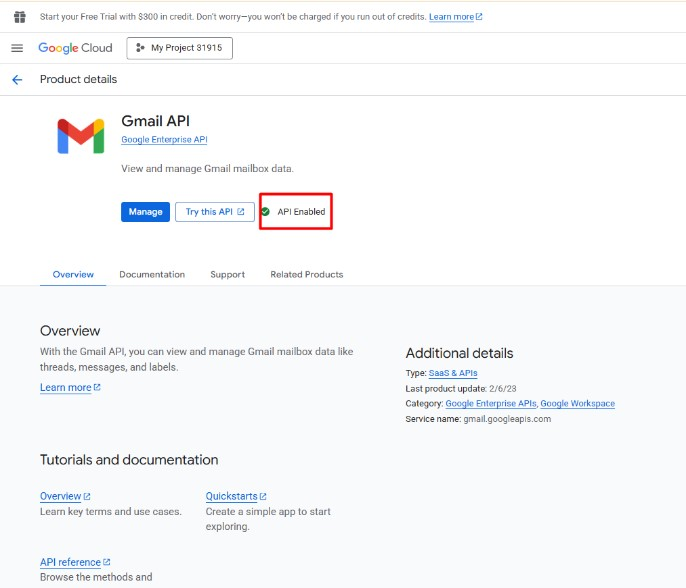
Navigate to APIs & Services > API Library.
-
Find Google Workspace and connect the Gmail API: select the icon and click Enable.
-
Go to the APIs & Services > OAuth consent screen > Data Access tab and add the required Gmail API scopes. See OAuth 2.0 Scopes for Gmail for a list of available permissions.
-
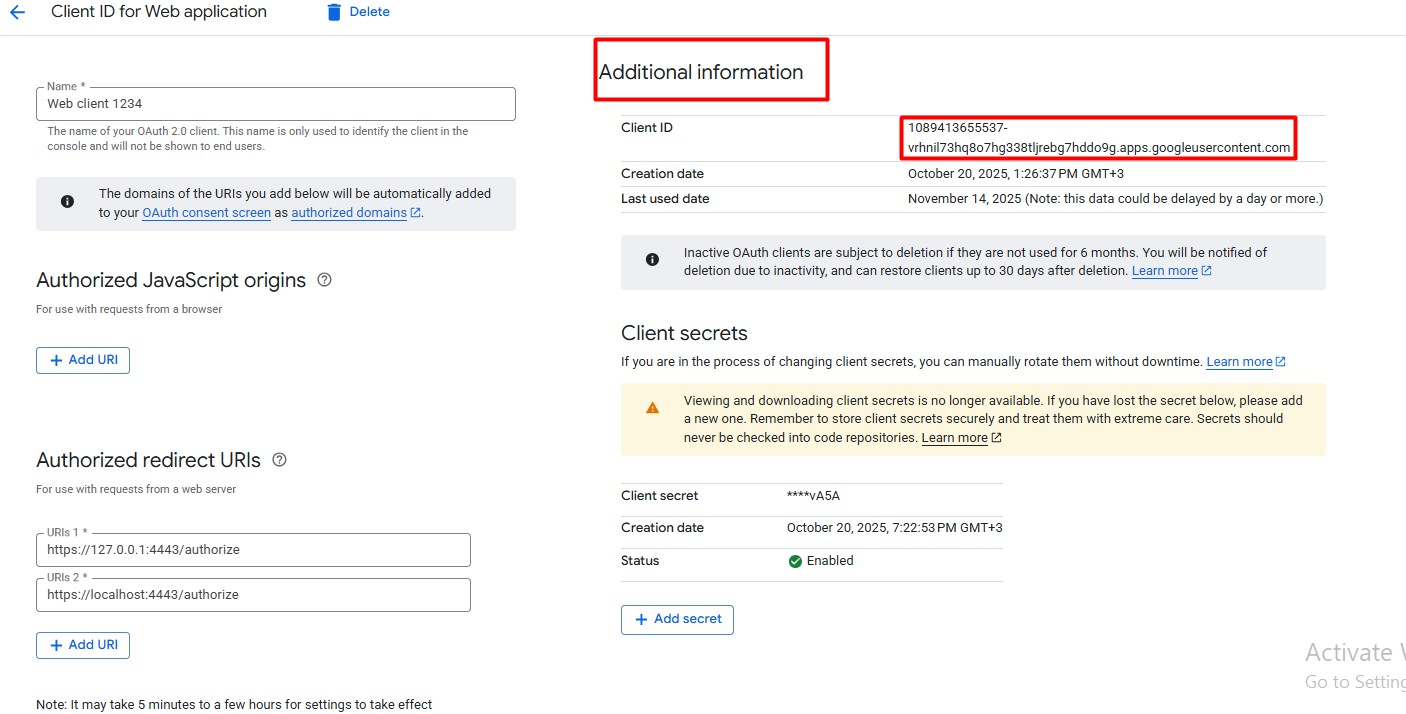
From the Clients tab, create a client and set the name and Application type to Web application.
-
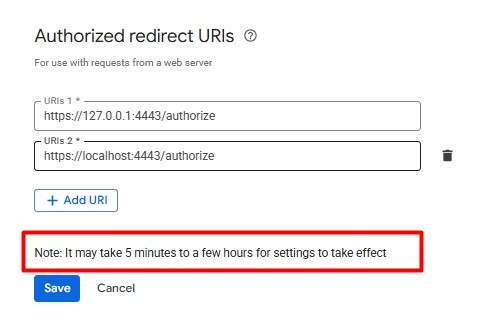
In the Authorized redirect URIs field, enter the following values (when you are logged into NAKIVO Backup & Replication on the VM where it is installed):

https://127.0.0.1:4443/authorize
https://localhost:4443/authorize
Note
Avoid using private IP addresses (e.g., https://10.84.0.70:4443/), as they are not supported.
-
Click Save to keep the changes. After saving your OAuth configuration, allow several minutes for the changes to take effect.
Important
Before starting the authorization process, log in to your Gmail account in the browser. Keep the session active to ensure successful authentication.
-
From the Additional Information section, get your Client ID.

-
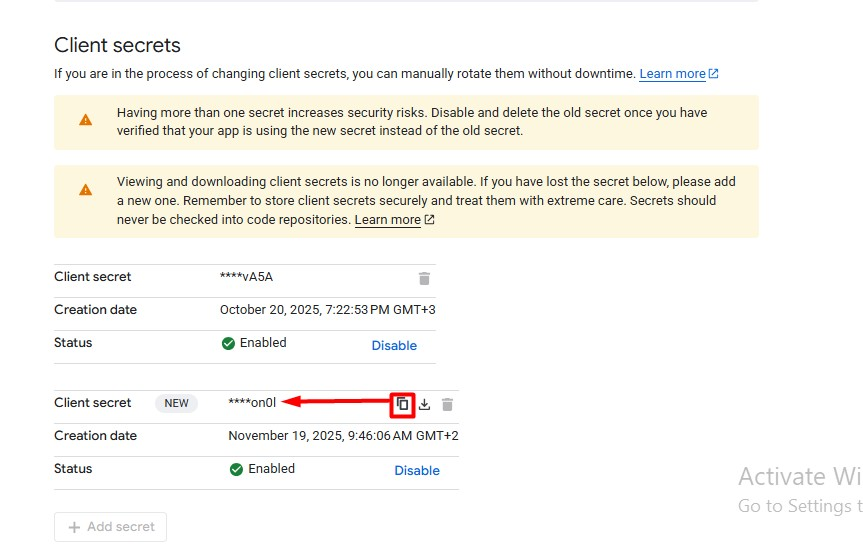
From the Client secrets section, copy your Client secret.

Note
The Client secret is temporary. You cannot copy the Client secret when it is expired. In this case create a new one.
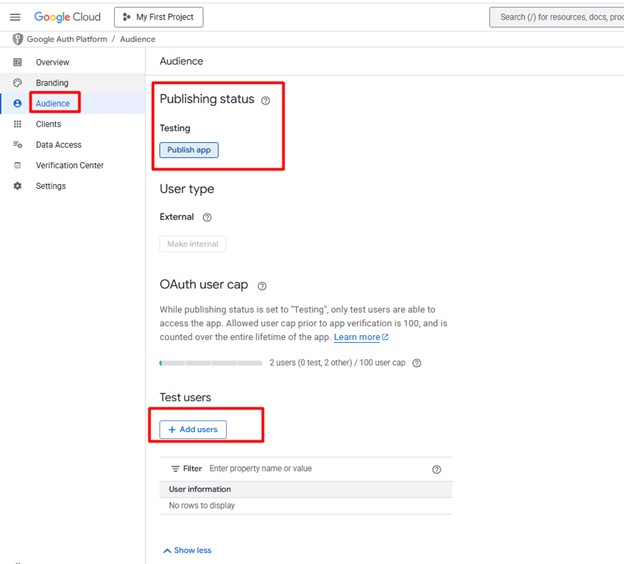
For New Gmail Accounts
If you are setting up OAuth for a new Gmail account:
-
Follow the same steps as for the Corporate email above.
-
Open the Audience tab and add the email address that will be used in Test users.
-
Change the Publishing status from Testing to In production.
In NAKIVO Backup & Replication
-
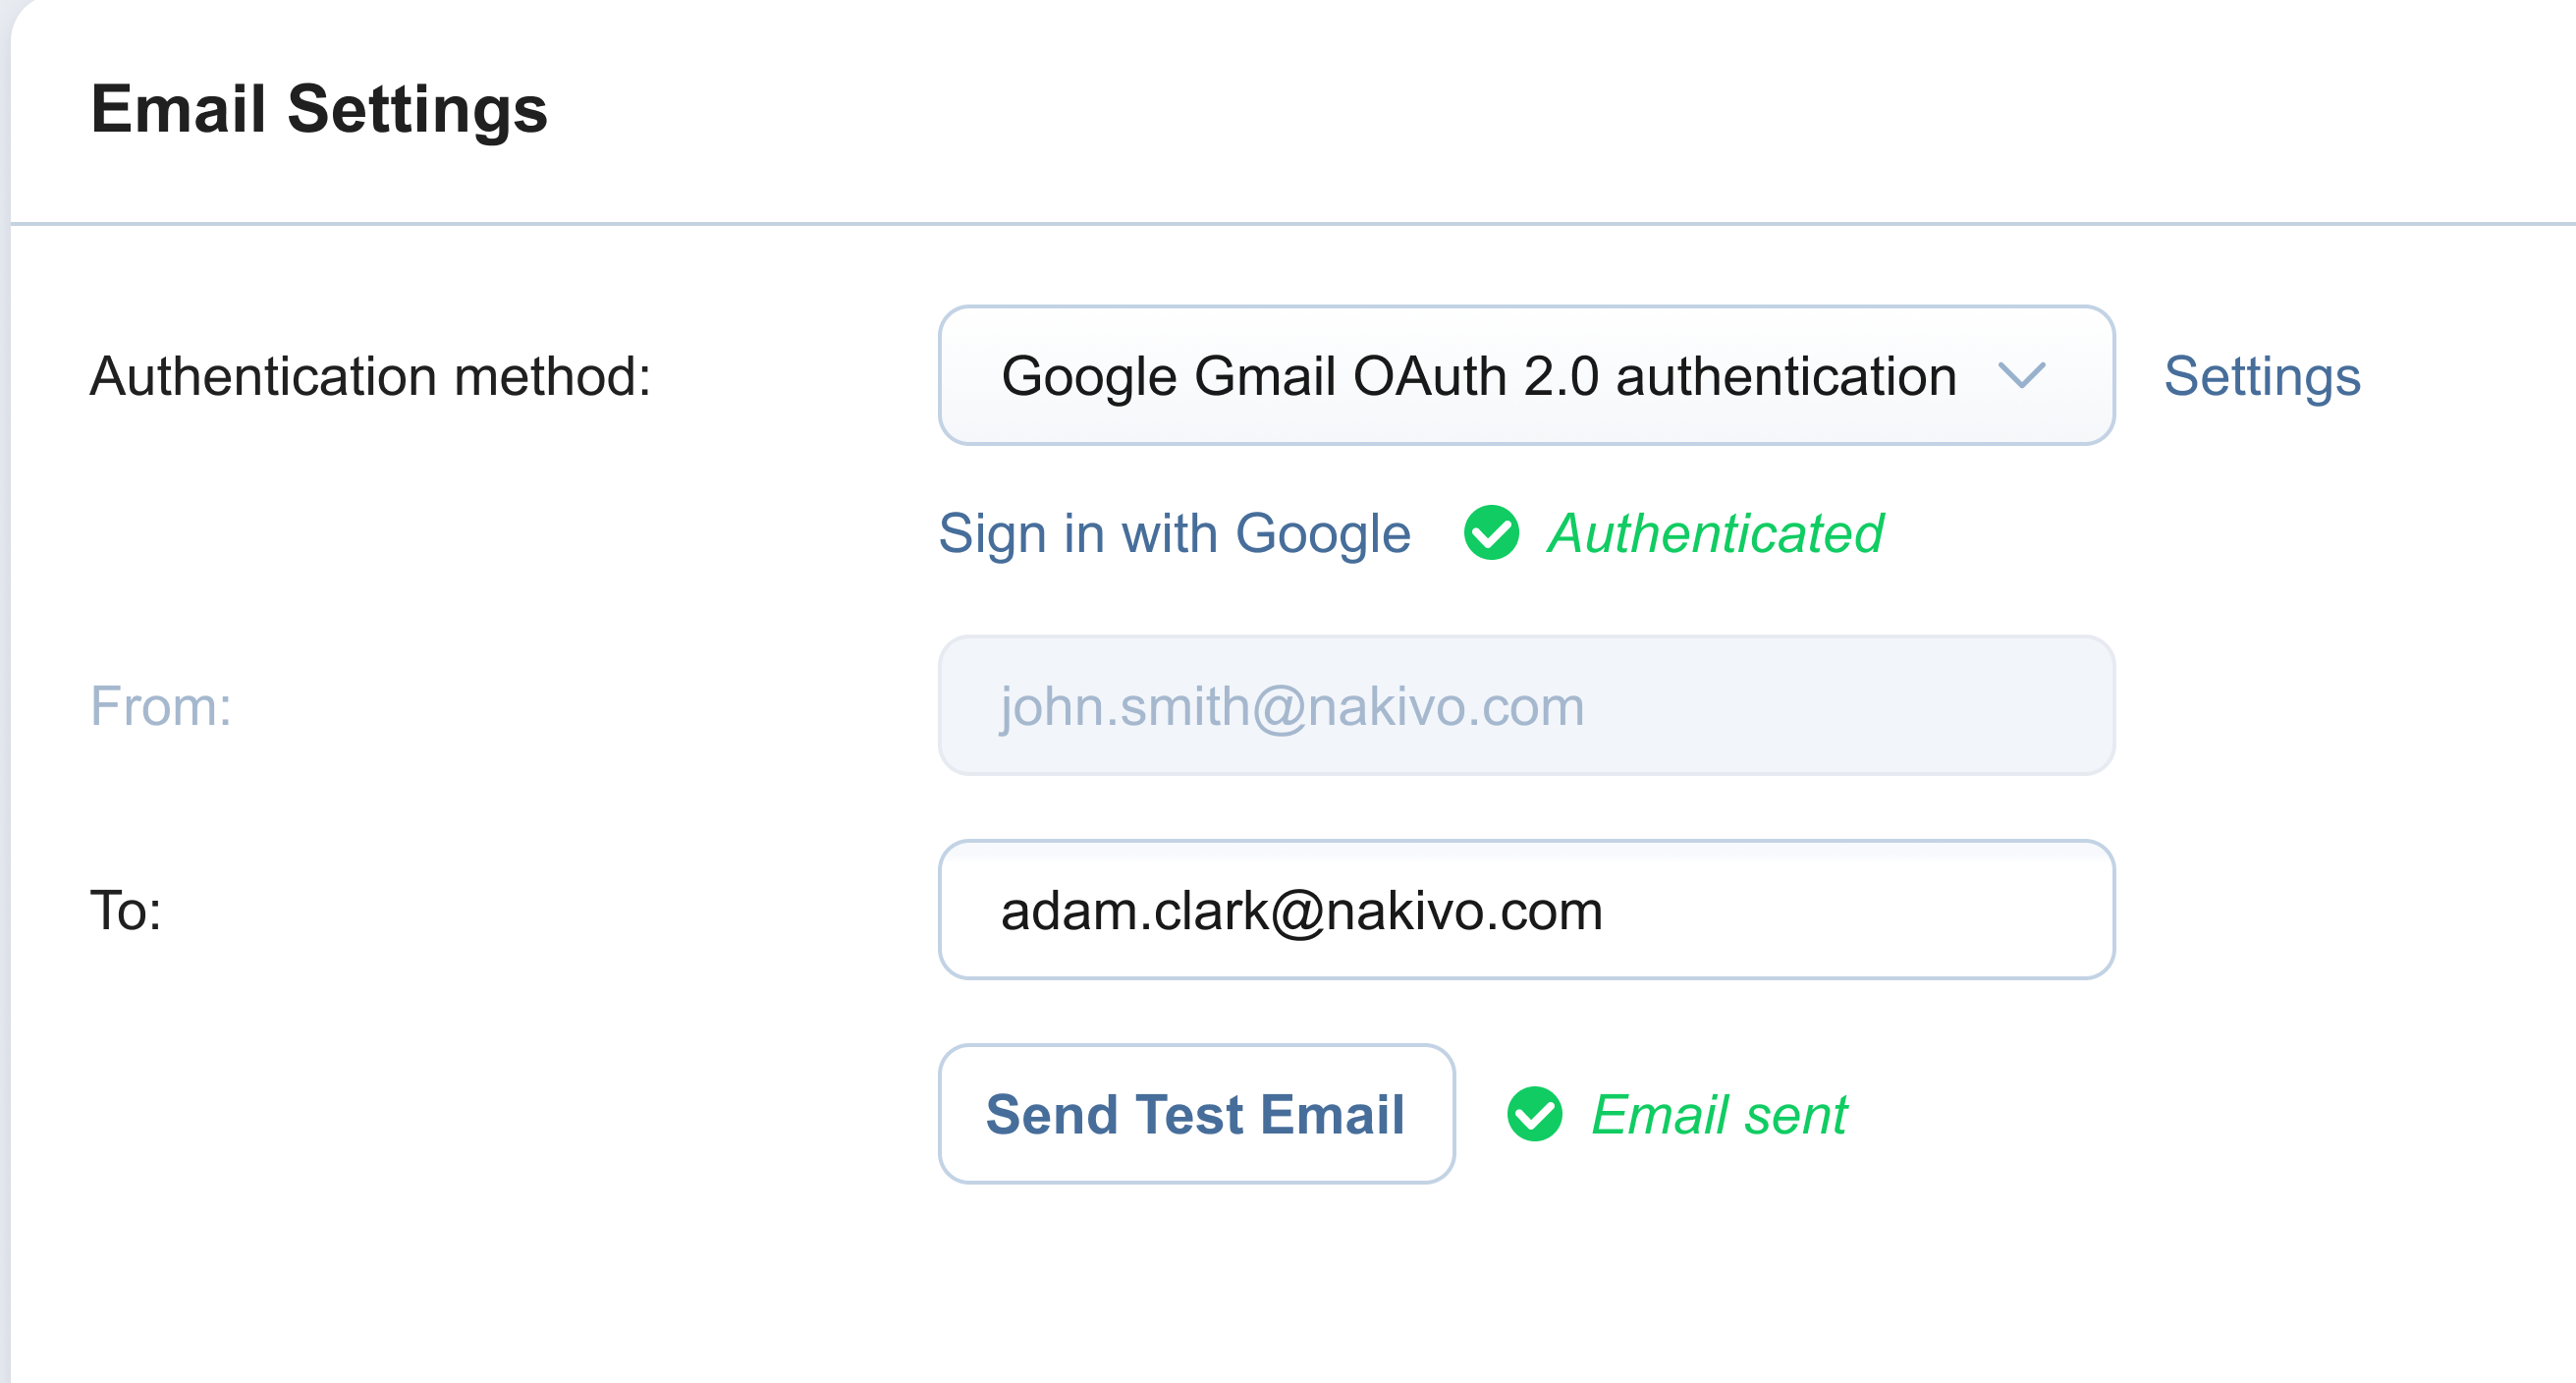
Navigate to Settings > Email Settings.
-
Under Authentication method, select Google Gmail OAuth 2.0 authentication.
-
Enter the following information:
-
Client ID: Enter the value obtained from Google Cloud Console.
-
Client Secret: Enter the corresponding secret key.
-
-
Click Sign in with Google.
-
In the web browser window, provide the Google account credentials to connect to NAKIVO Backup & Replication. If the authentication is successful, the ‘Authenticated’ notice appears.
-
Enter the email address in the To field.
-
Click Send Test Email to confirm that the configuration works.
Notes
Ensure the Gmail API is enabled and the correct redirect URIs are configured.
If authorization fails, verify credentials and permissions in Google Cloud Console.
Ensure you are signed in to your Google account during setup.